Table of Contents
Adding custom fields to your WordPress site helps you display additional information about your content and can improve SEO for Google and other search engines. But how to show custom fields can be a pretty challenging thing to achieve by non-technical users
By default, WordPress gives you the possibility to add custom fields (sometimes called post metadata) directly from the user interface. You can then use custom fields to display metadata on individual posts or pages in your WordPress site.
There are also a lot of plugins that let you add advanced custom fields like inputs, checkboxes, selects, etc.
However, almost all of those solutions fall short when you want to show custom fields in your template. In this tutorial we’ll go through how to show custom fields using code, then if you’re not a developer, we’ll introduce you to a tool that lets you do this without writing a single line of code.
Show Custom Fields Using Code
The default way to show custom fields in WordPress would be to:
- Open the single.php file or page.php theme file (via FTP or locally). If you’re working with a third-party theme, you should create a child theme.
- Find the_content function so you can list your custom field data after the actual content of the post or page.
- Use the get_post_meta function to fetch custom field values using their meta key then list them using PHP echo.
It doesn’t sound too complicated, but you’ve lost a non-technical user at opening single.php template file
This is how your page.php file in your WordPress theme could look if you wanted to show two custom fields, book title and book ISBN code:
It’s not rocket science and really simple to pull off.
The problem starts when you try to do more complicated stuff, like groups of custom fields (custom meta boxes), repeater fields and custom field groups, connecting posts using your fields.
Show custom fields using Swift Templates without code
Displaying your custom fields in the frontend of your WordPress site is one of the simplest ways to transform your website from static pages to a proper WordPress content management system (CMS). You can use your own custom fields for:
- Adding extra information on your posts and pages
- Showcasing your team
- Listing testimonials
- Simple property listing
- Custom product pages
- Custom landing pages
- Listing company services
- And pretty much anything that might require some extra information
It’s possible to create all of the above without being a developer in three steps:
- Install the WordPress Creation Kit Pro plugin (Swift Templates is part of it)
- Create some custom fields using the Custom Fields Creator plugin (part of WCK)
- Insert them in your theme using Swift Templates
Start creating custom fields so we can enter our content
With WordPress Creation Kit, when creating custom fields, you can target individual IDs, page templates or entire post types.
This means the extra custom fields or field groups will appear on individual IDs, page templates or entire post types. It’s really cool because we can list different custom fields on different pages.
We’ll build a Favorite Books page that:
- Allows us to enter Book Title, Cover, Description & Link
- Will be a repeater field (so we can add as many books as we want)
- Will be sortable, so we can order by our most favorite book
- All of this will then be available inside our template using just HTML and Swift Template Tags
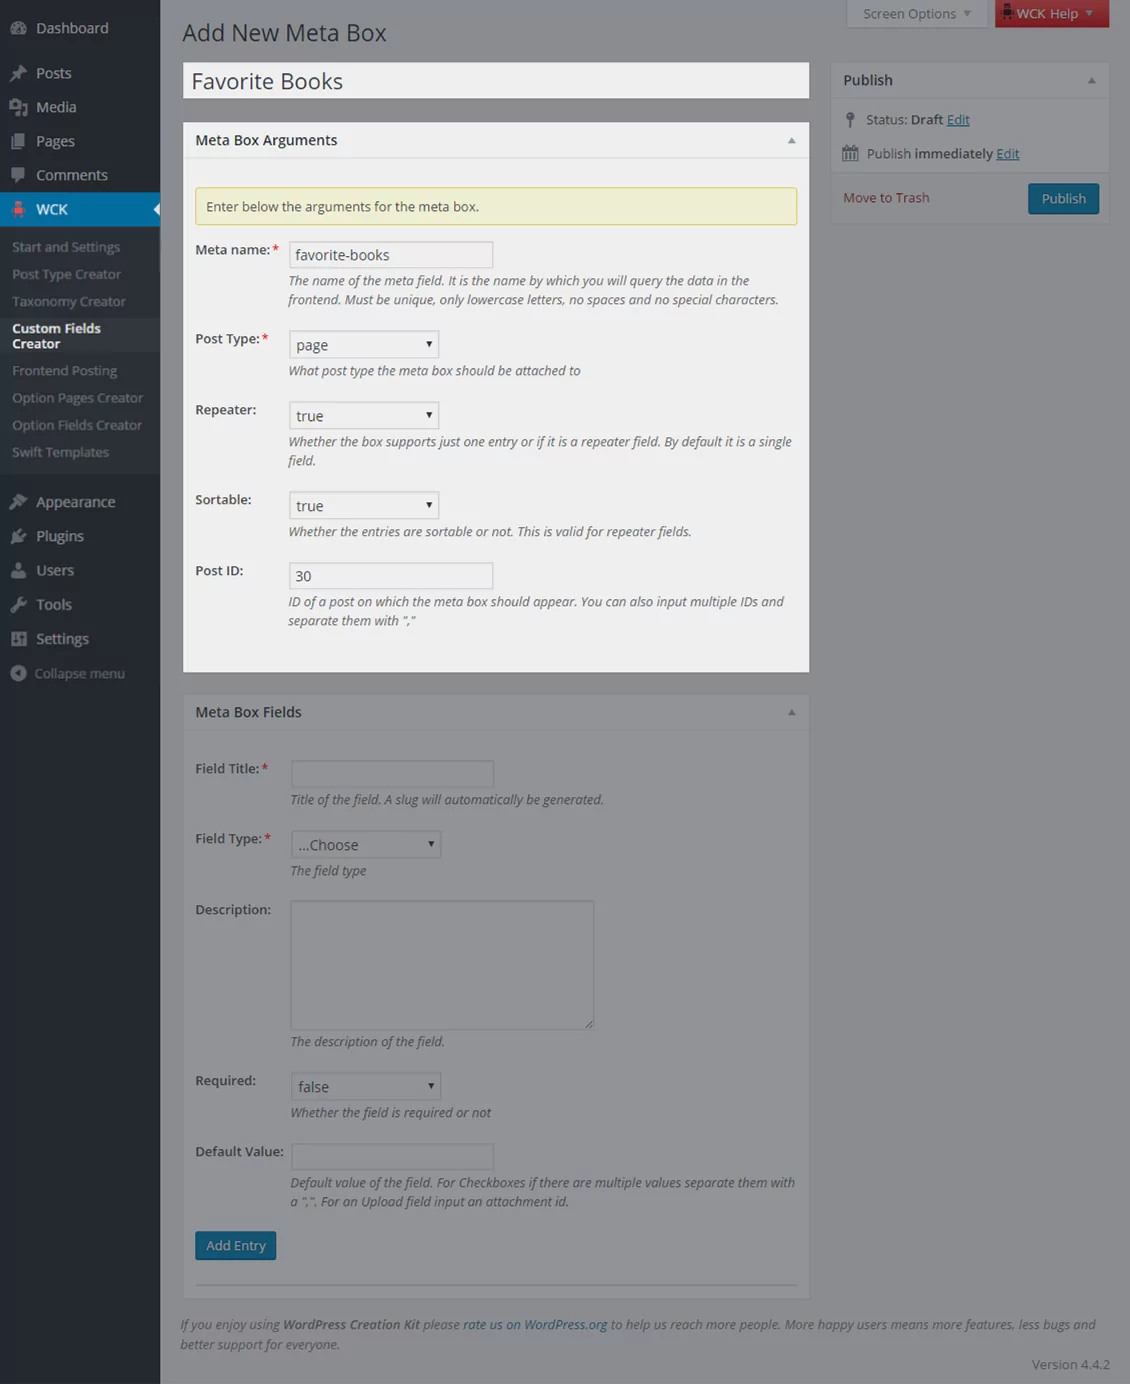
Go to WCK -> Custom Fields Creator and then click “Add New”.
Here, we add a meta name for the field, select the post type from the dropdown, and select whether it’s a repeater and sortable. Since we only want this metabox to appear on the Favorite Books page we’re also specifying the ID (30 in this case, but will probably be different in your case).
Creating our custom fields
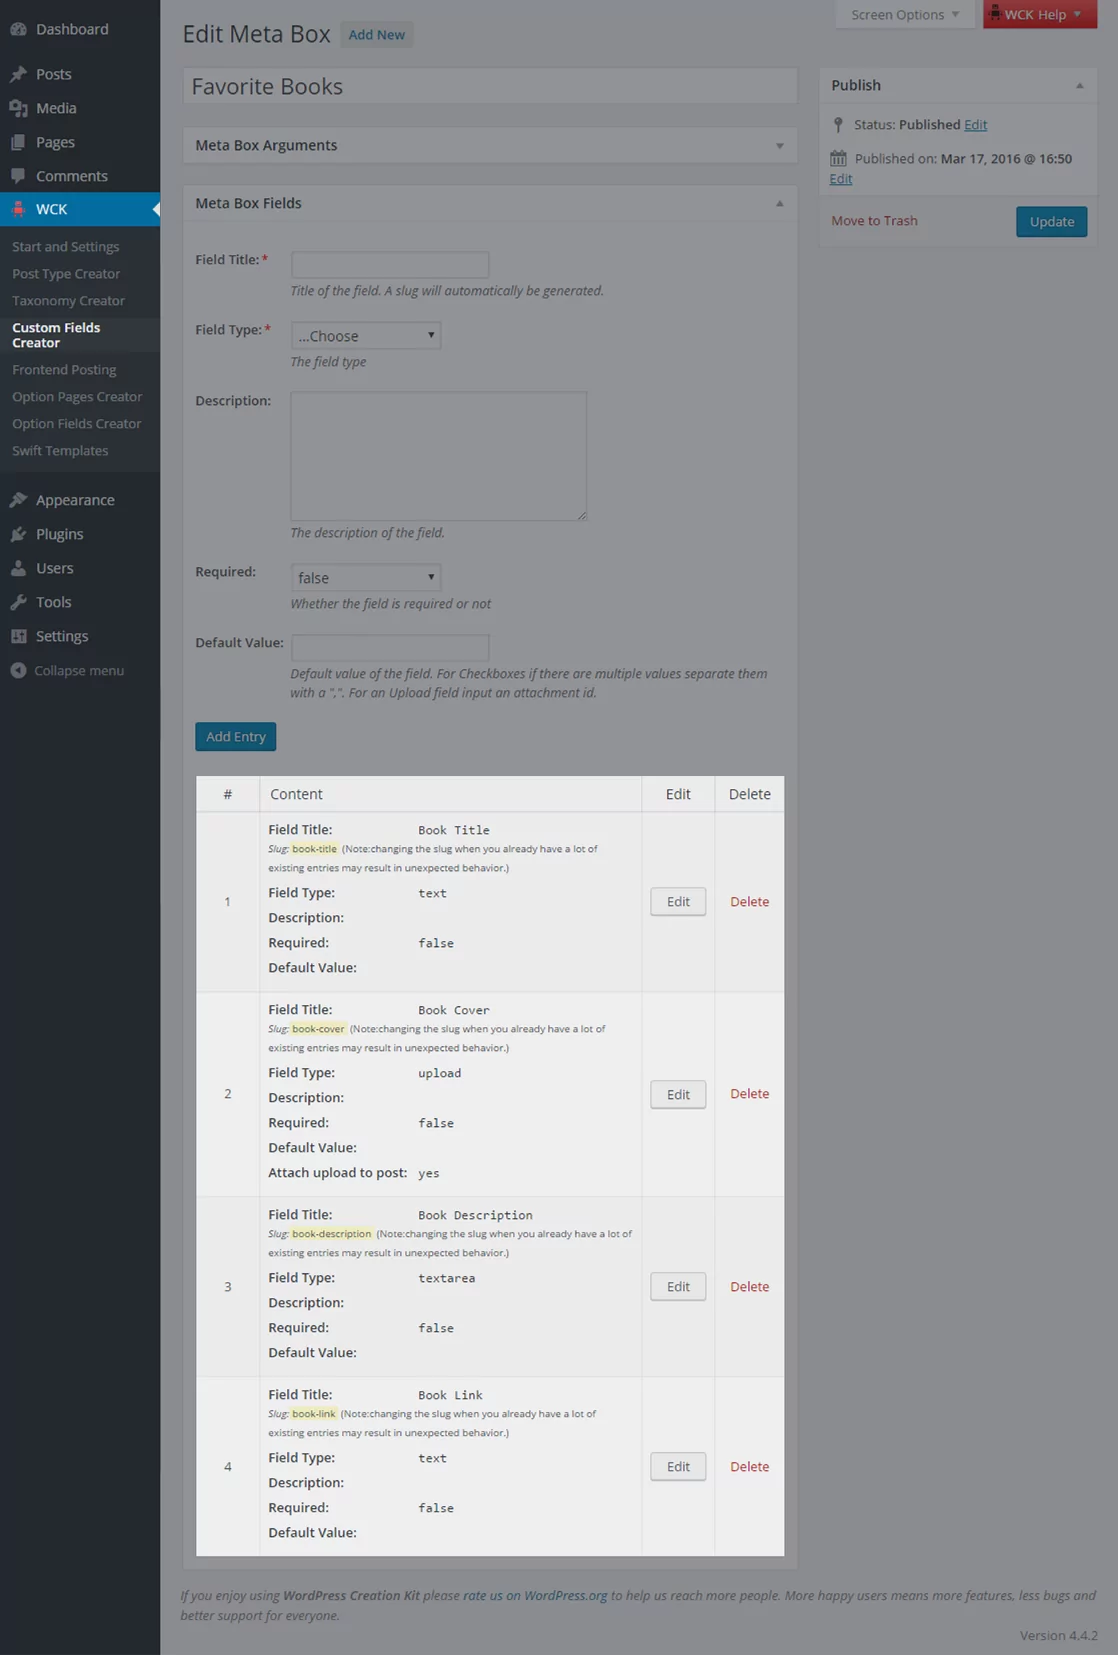
The book title and link is a normal input field type, the book description is a text area while the cover will be an upload field type.
This is how our Custom Fields setup will look like:
Show custom fields in your template
Now that we’ve set up exactly the custom fields we can add them to existing or new posts and pages. In this case, we’ll add them to our Favorite Books page.
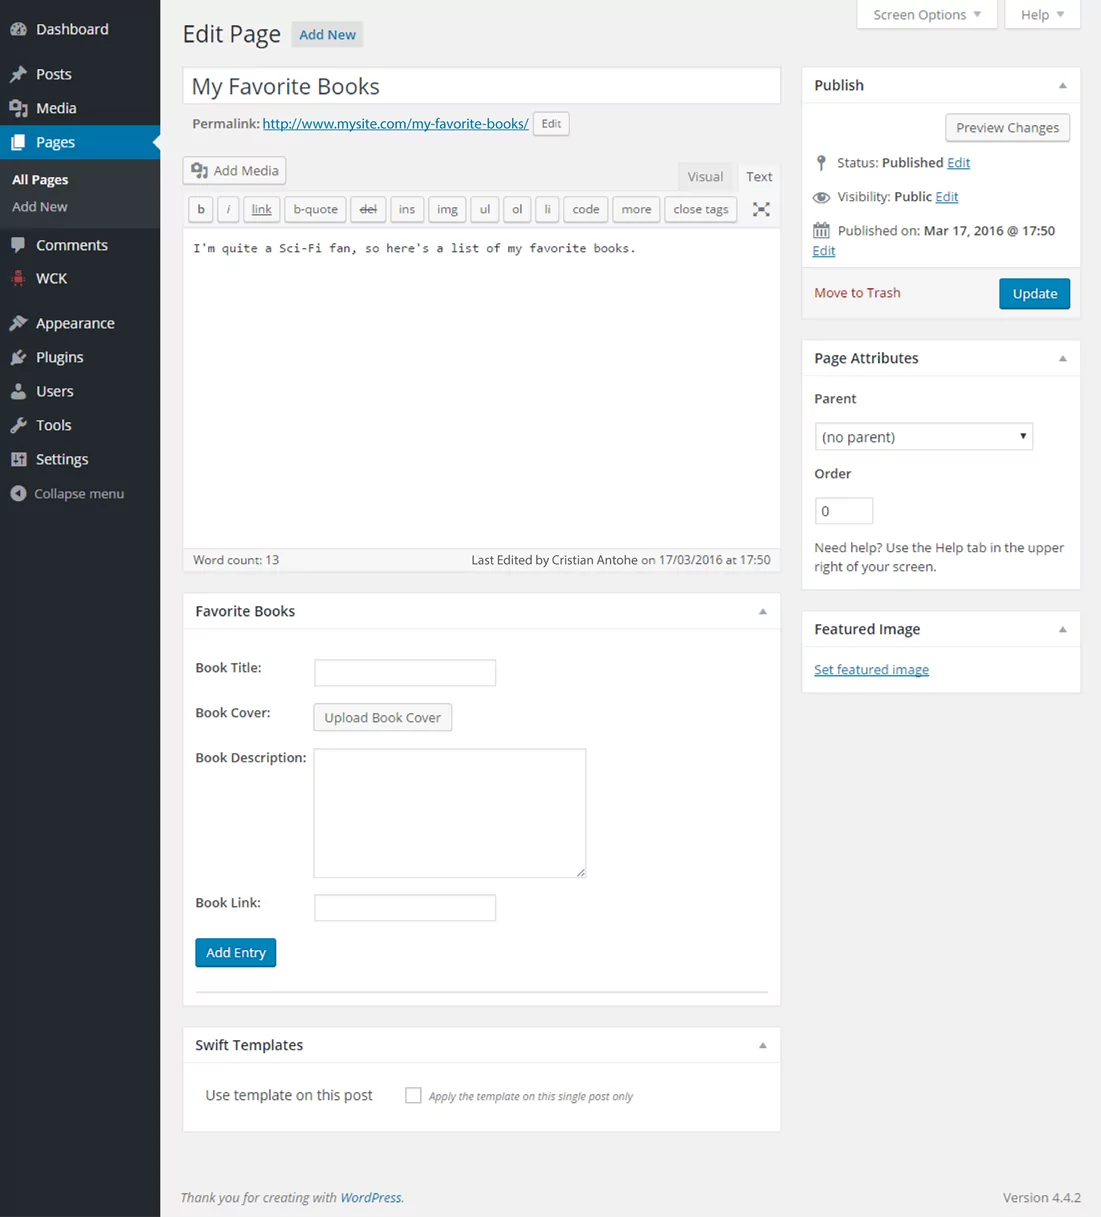
Go to Pages -> My Favorite Books page
By default, there’s nothing there since we haven’t entered any custom fields (we’ve just defined them).
So the first step would be to add some custom fields that will represent our Favorite Books.
This is how our Favorite Books page looks like, without content in custom fields and without showing custom fields in the template yet.
(Note: If you can’t see custom fields in the WordPress editor, click on the Screen Options tab and select that option)
After entering information for a few books in our custom fields, it is finally time to show custom fields in our template.
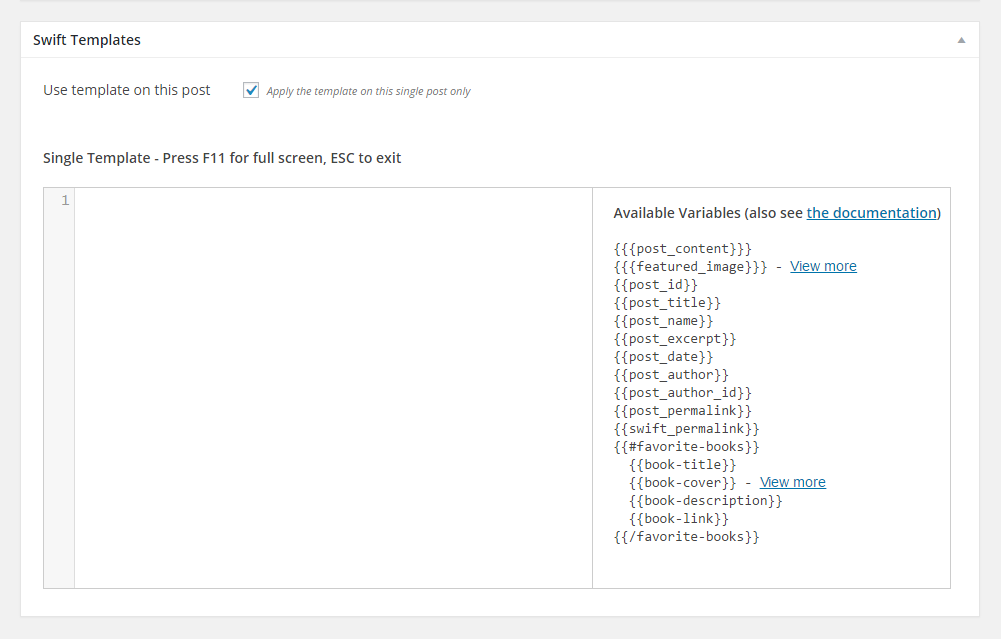
In the “Swift Templates” metabox, select the checkbox “Use template on this post”
Again, by default there is nothing there, so we’ll need to add some HTML to show custom fields in that page alone.
All the custom fields tags are available in the right column so everything you need, to show custom fields in your template, is easily available.
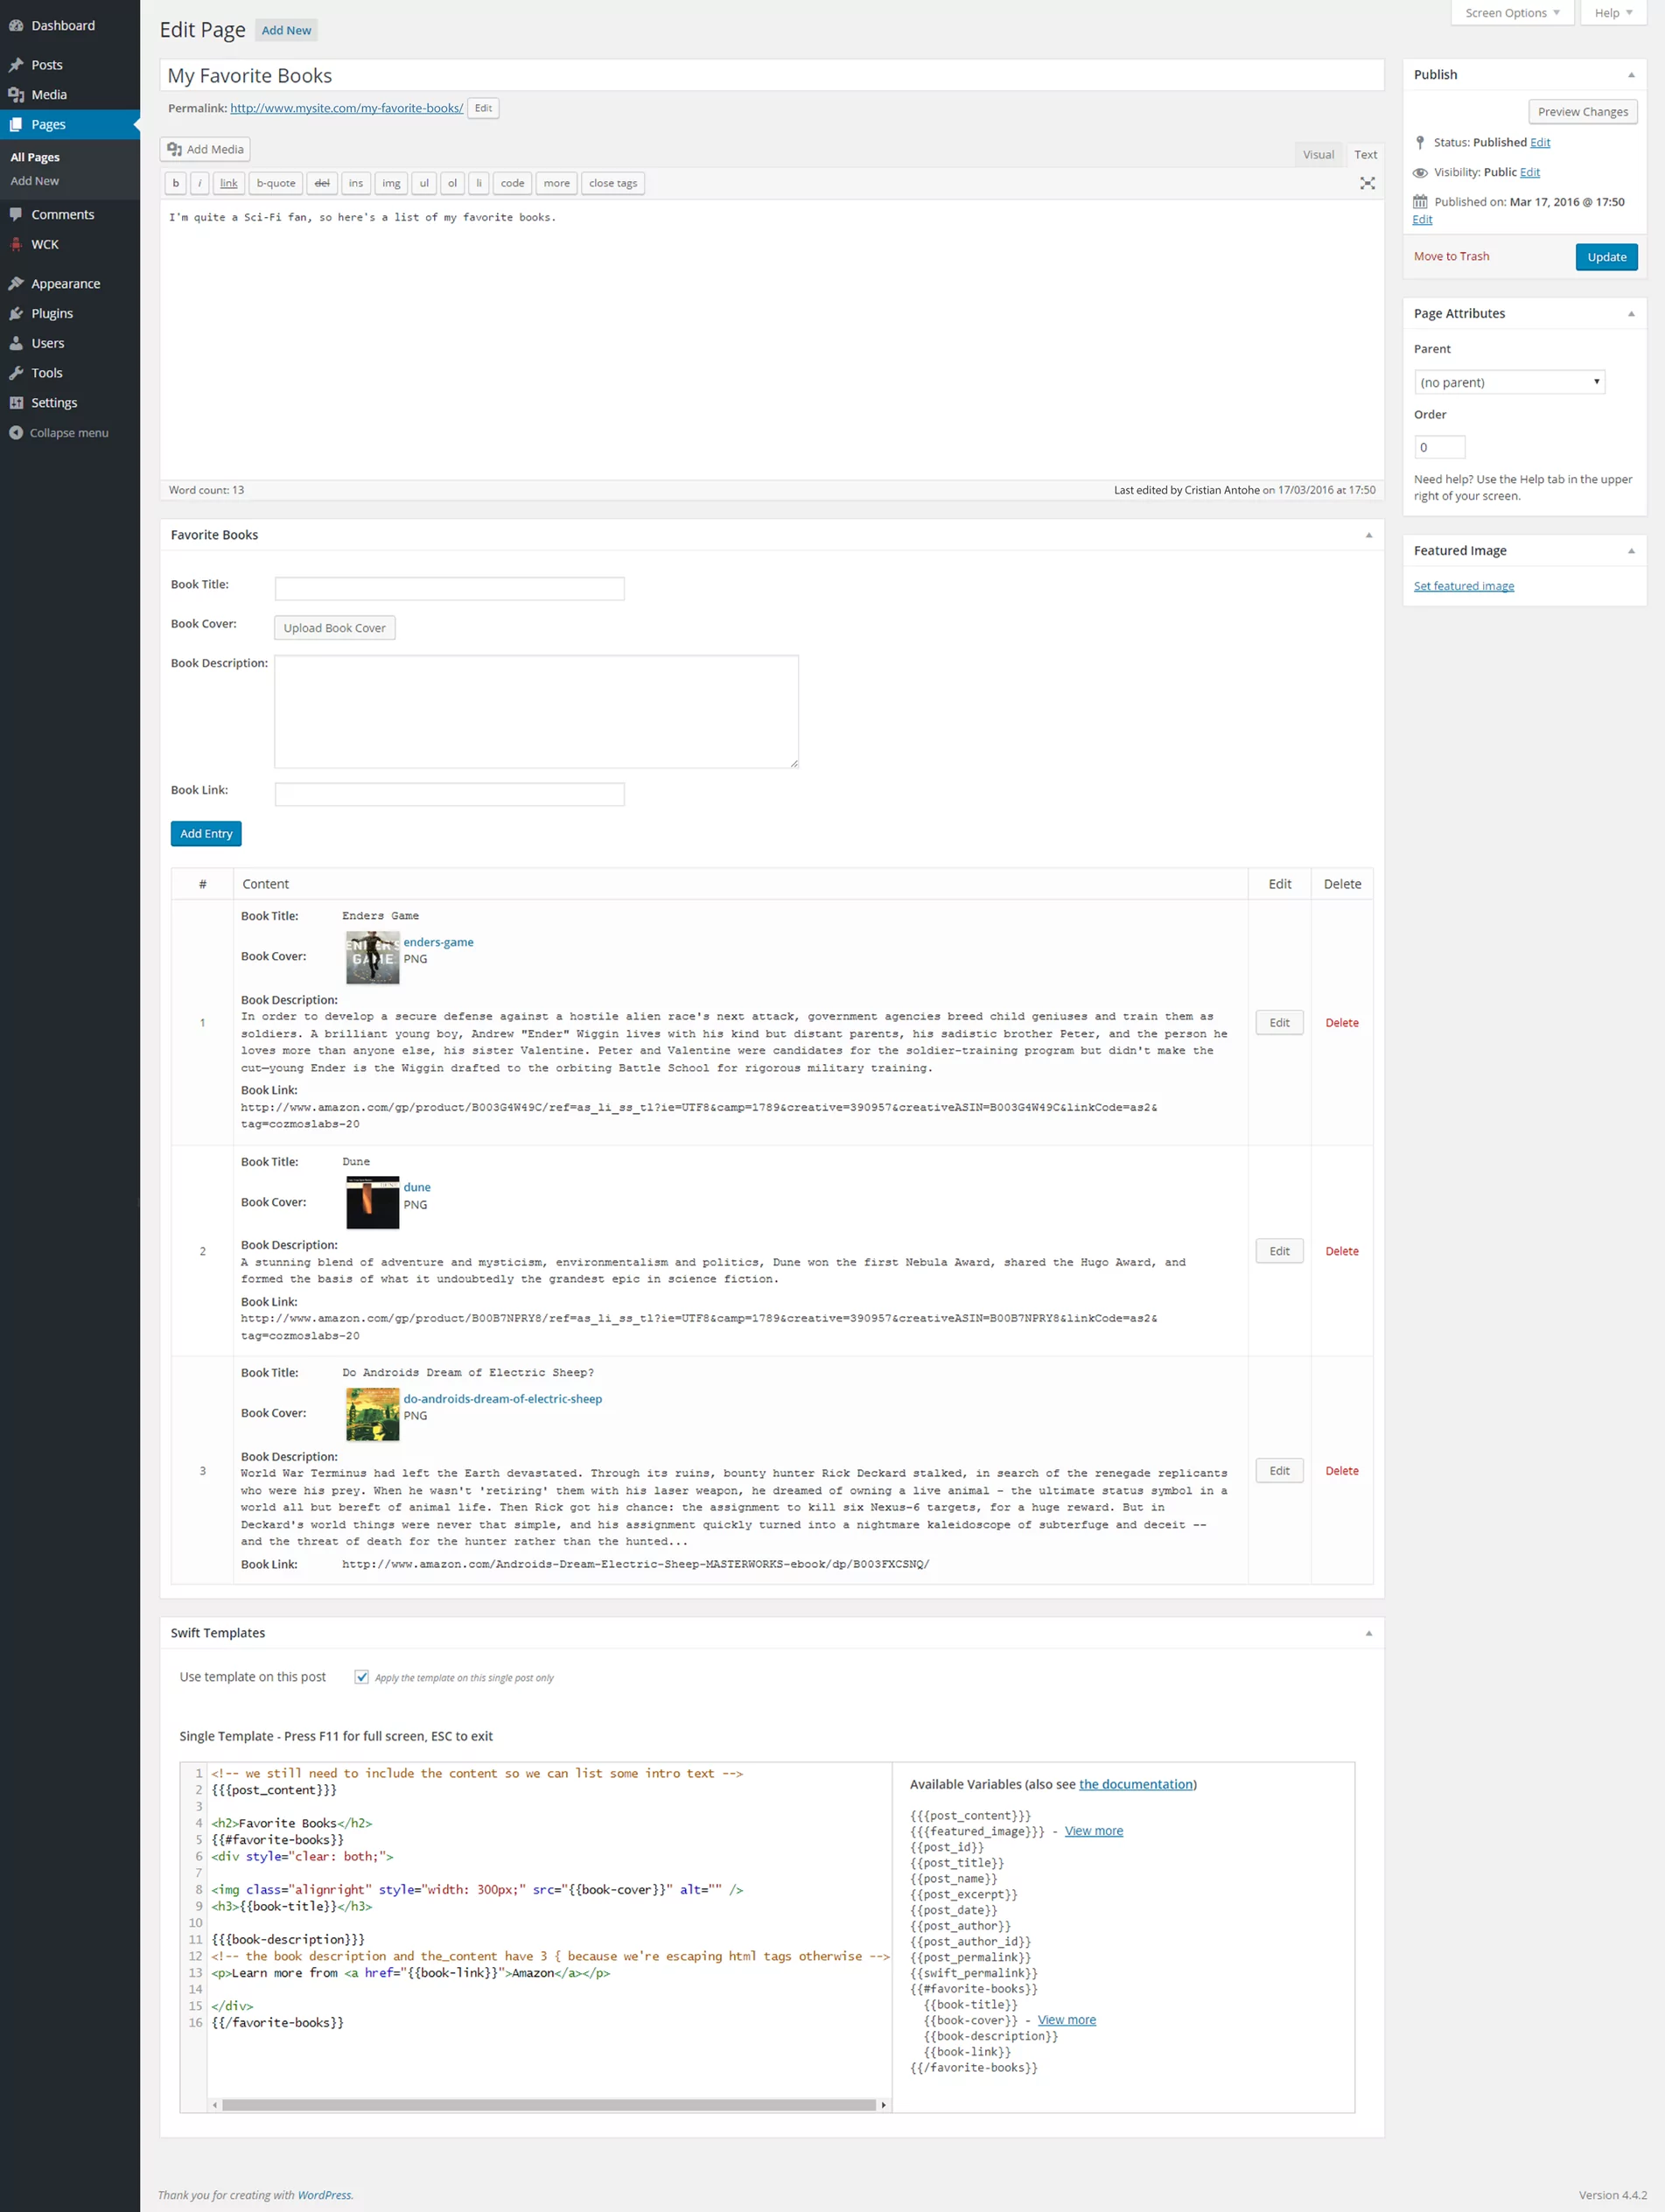
For this example, here’s a simple HTML structure with all the custom fields in it.
So as a recap:
- We’ve created repeater custom fields for our books
- Entered some book information in those custom fields including an image of the cover
- Created a basic template with all that information that will allow us to show custom fields in our theme
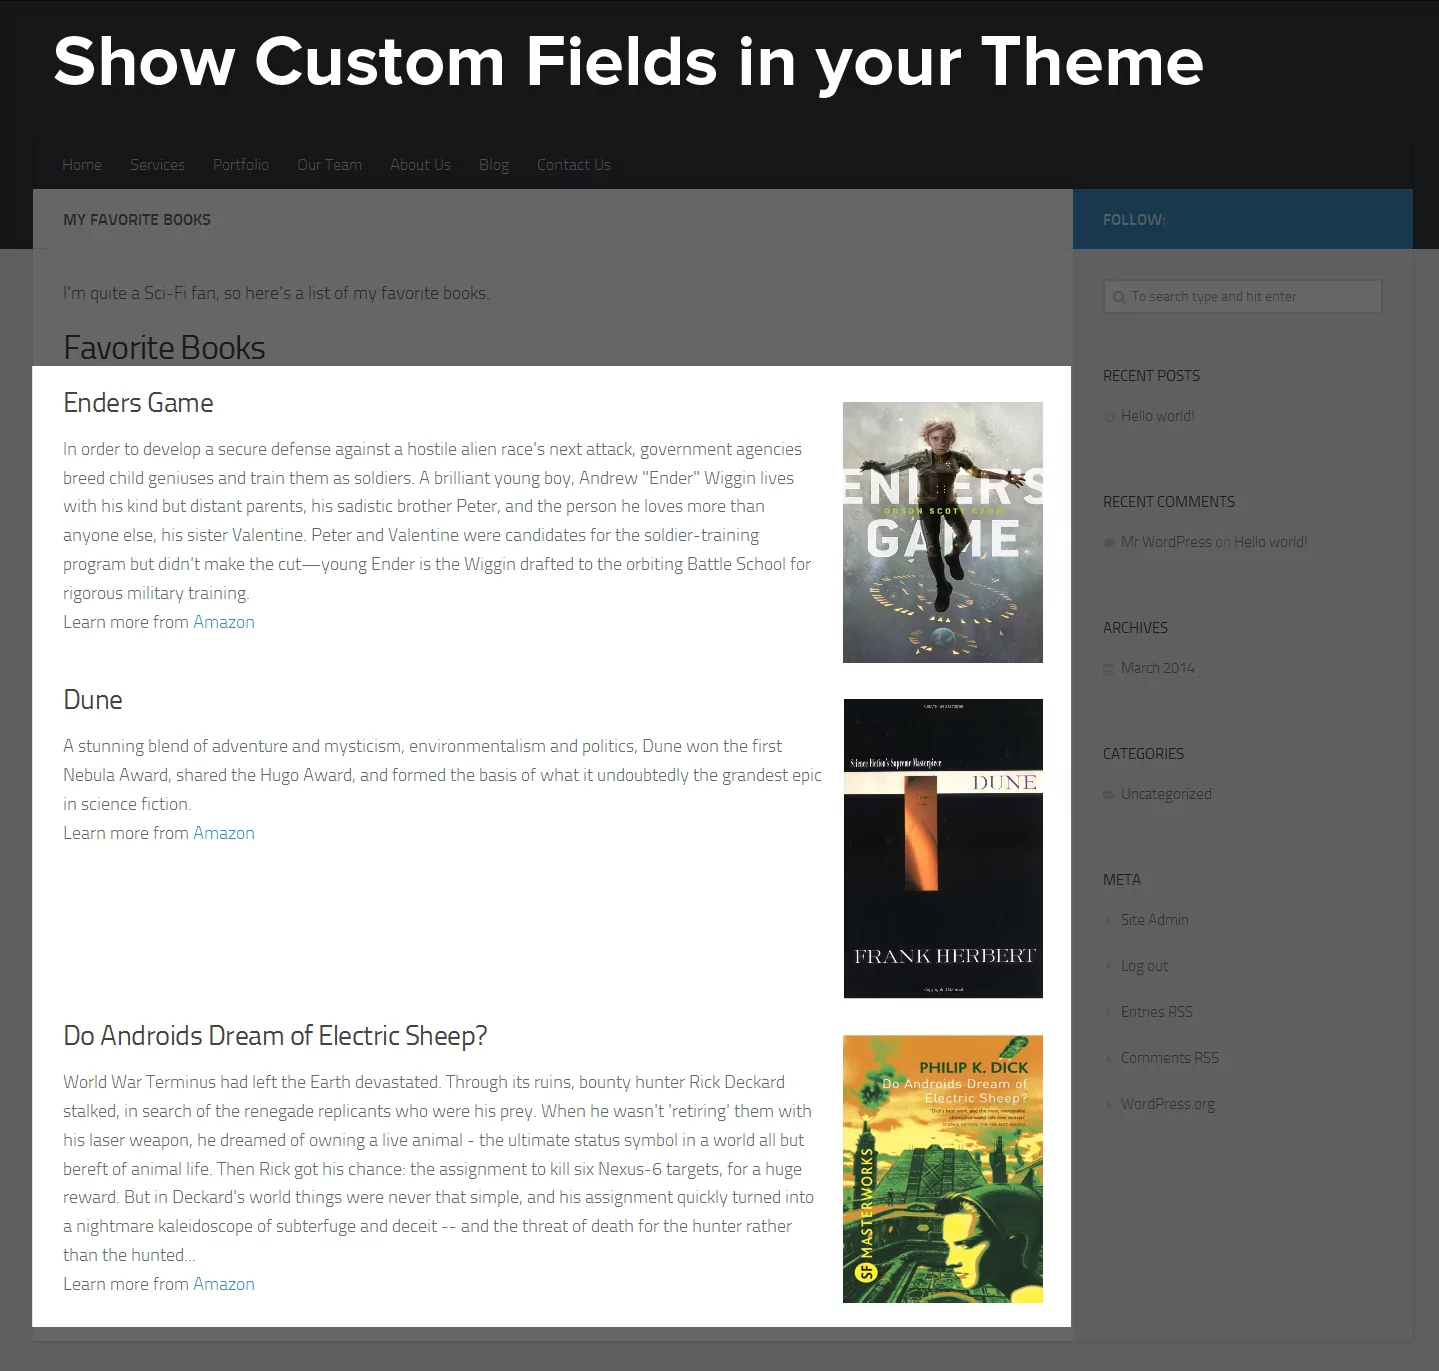
Here’s a screenshot of “My Favorite Books” page after doing all of the above.
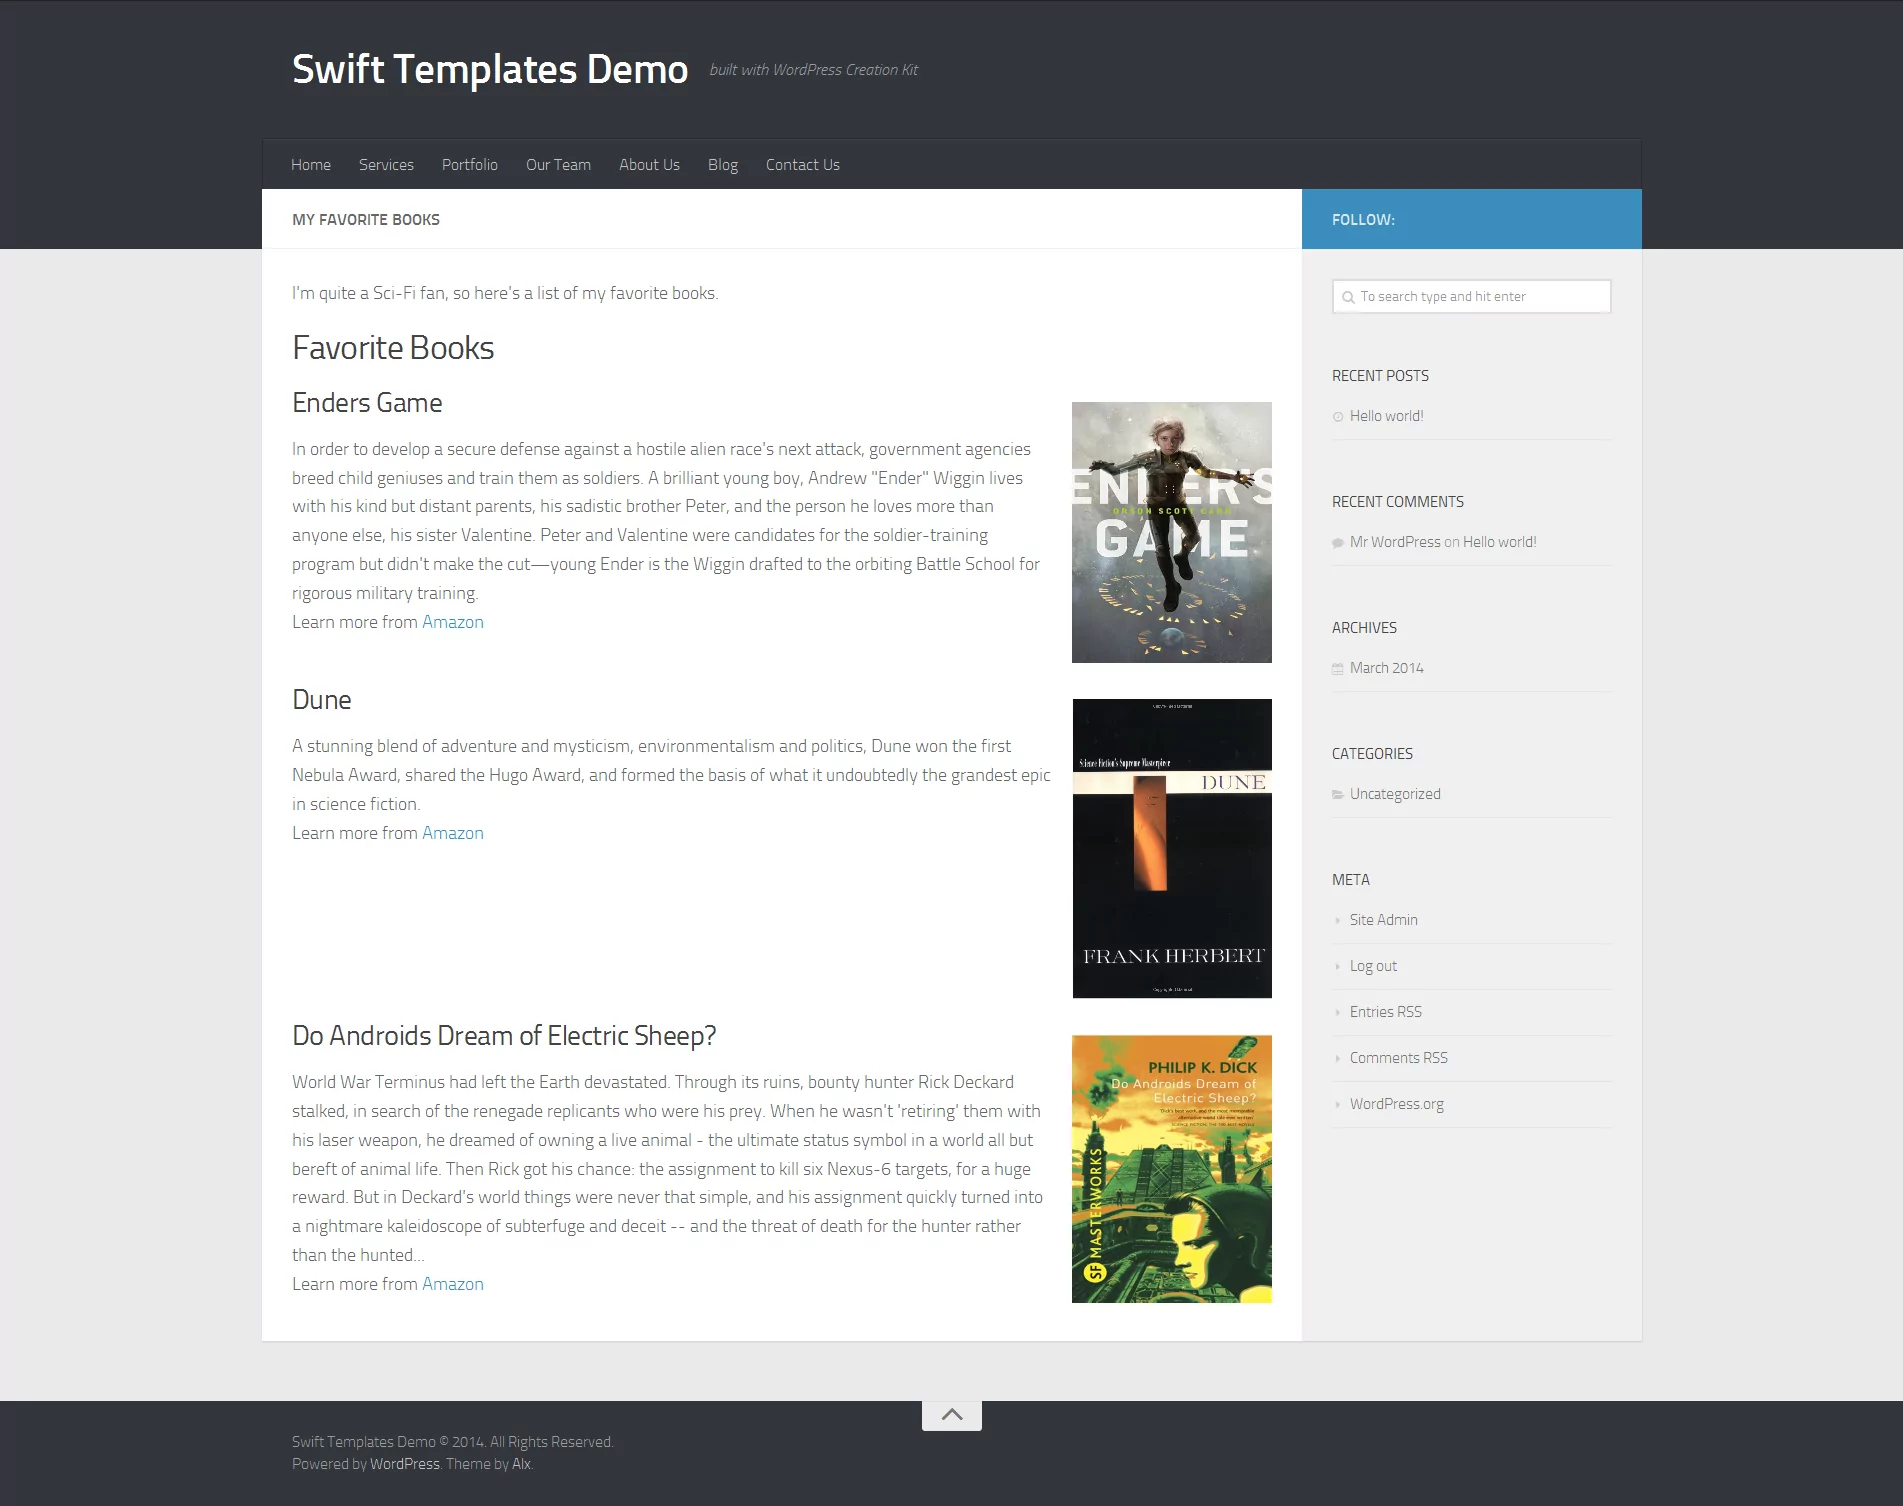
And this is how this looks in our theme:
The custom fields are displayed on the page, and you could then style them using CSS to make them look the way you want.
While this is just a basic tutorial, it is quite possible to build complex WordPress websites with advanced custom fields using just WCK and Swift Templates:
- Post to Post Relationships
- The easy way to create a WordPress team page
- Custom archive listings of custom post types, custom fields included
Also, if you want to learn more about WordPress Creation Kit Pro just visit the plugin page.
There is also a completely FREE version available over at wordpress.org that allows you to:
- Create custom post types
- Create custom fields
- Create custom taxonomies
- Show custom fields using the template API
Related Articles

Beginner’s Guide to: What Is WordPress?
Ever now and again the question arises with new clients that aren't really tech savvy: "What Is WordPress?" What I'm hoping to achieve with this post is to drop the technical jargon for a minute and explain in down to earth words what is WordPress, how can it help you, what is WordPress.com, what's a […]
Continue Reading
Best WordPress Monetization Plugins & Tactics to Grow Your Revenue
You will agree that finding the best WordPress monetization plugins (and tactics) to grow your revenue is challenging. If that describes your situation, you're in the right place, and we have your back as always. Like you, I had big dreams when I started my first WordPress site. Also, like you, I was skeptical about […]
Continue Reading
A Guide to WordPress Forum Plugins: The Best Plugins & How To Manage Them
If your WordPress site is designed to serve and engage with a community, you’ll need to install a WordPress forum plugin. Forum plugins add a platform where users can ask questions, provide answers, and join in discussions. It promotes engagement and gives users a sense of being part of a community. You can use it […]
Continue Reading
I agree that getting the custom posts for a non-programmer is the hardest part. I just don’t see how using the swift templates requires no code at all, because I got lost after
Again, by default there is nothing there, so we’ll need to add some HTML to show custom fields in that page alone.
My impression is that you have to be able to understand the code to move on from that point. I get the impression you’ve made it easier for someone who knows a little php, but not for someone who doesn’t know any php.
Good
I am a doing a training in php.and i never know how to show a custom field under a post.but the code is given above in page.php file.its really help me alot.
Thanks Alot.