Table of Contents
The Group Memberships add-on for Paid Member Subscriptions lets you sell subscriptions to groups of people.
A single person takes care of the billing aspect of the subscription and can invite a number of additional members, depending on the subscription settings, which get access to the same subscription without having to pay again.
Group Memberships are also known as Umbrella Memberships.
Some usage examples for this add-on would be selling Group Memberships to Companies, Families, a School Teacher signing up his/her class etc.
Since the Group Owner is responsible for the billing of the subscription, management of the subscription for multi-member groups is a breeze. If the owner subscription expires every account from the group will expire as well.
The Group Membership add-on is available only with a Paid Member Subscriptions Pro, or Agency license.
After purchasing a premium version of Paid Member Subscriptions, you can check the following guide on how to install Paid Member Subscriptions.
After the installation of the Pro, or Agency version, in order to activate The Group Memberships Add-on, go to Dashboard → Paid Member Subscriptions → Add-ons → Group Memberships and click Activate.
Group Memberships can be created by navigating to the Paid Member Subscriptions → Subscription Plans → Add New page.
Select the Group subscription type and add the number of seats you want this plan to have. The pricing of the plan is for the total number of seats you are defining.
By creating a tier of Group Memberships you can offer different pricings per number of available slots to your customer.
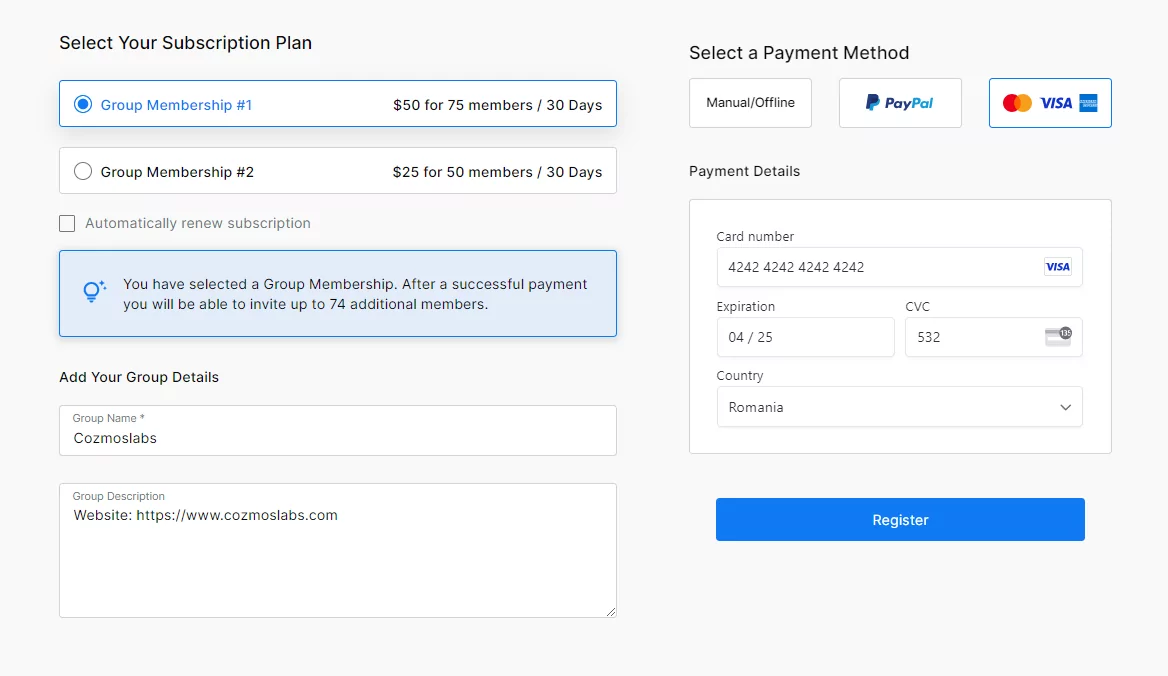
In the registration form, alongside the regular information about price and duration, the user will also be able to see the number of seats that are available for that particular plan.
When selecting a group membership for purchase a message will be displayed to the user letting him know that he can invite additional members to the subscription after the payment is successful.
Two custom fields will also appear, one is required and is for the Group Name and the other is for the Group Description.
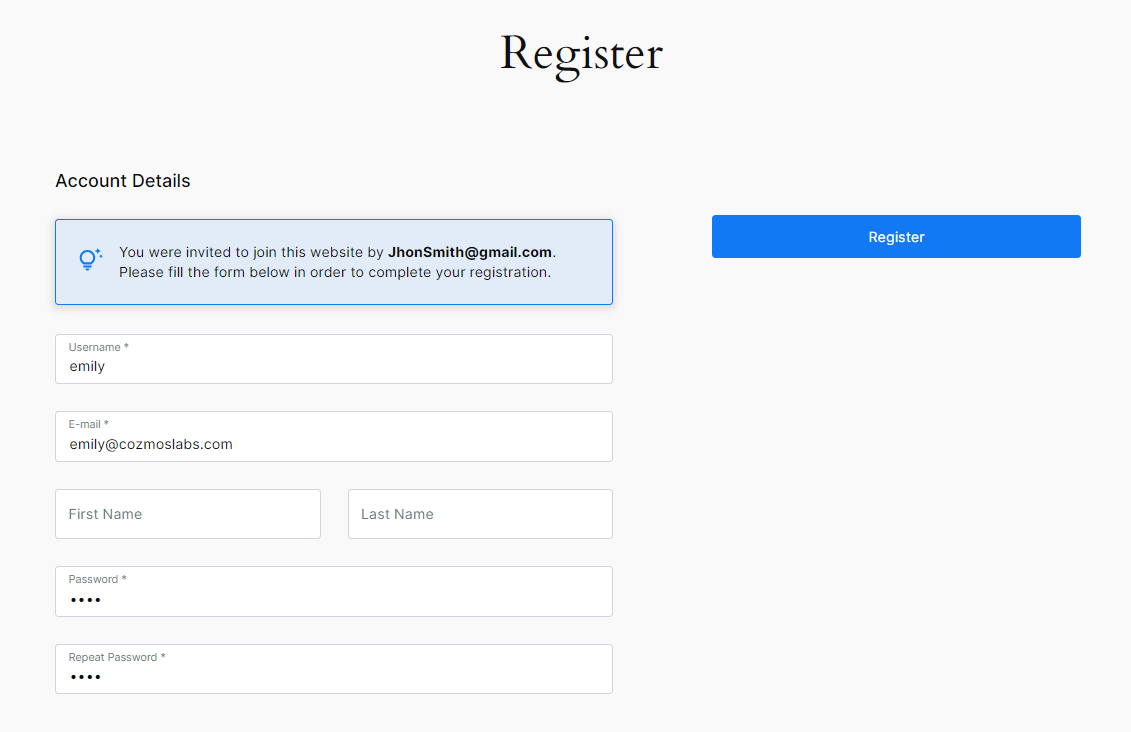
When a user follows an invitation link for a Group Membership he will only need to provide information about his account. There will be no payment and no membership selection, this is determined automatically.
The invited user will not be able to specify a different email address than the one the invitation was sent to.
At the top of the form, the invited user will see a short message explaining that he was invited to join this website and by whom.
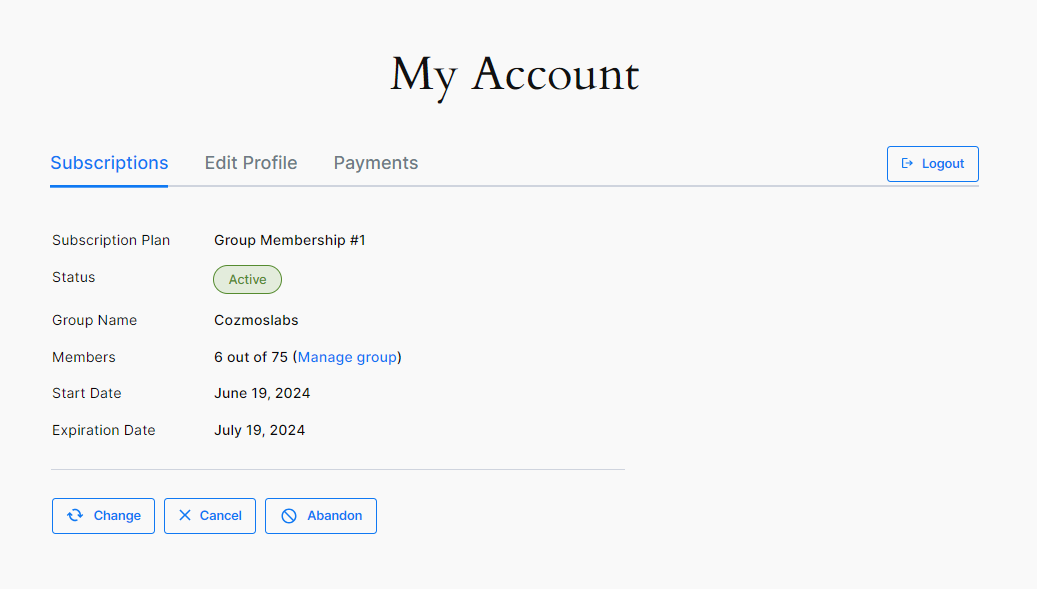
The Group Owner Dashboard is the place group owners use to manage the members of their Group Membership.
It allows the owner to invite or remove members, resend invitations, or edit the group details.
The page can be accessed by clicking on Manage Group from the Subscriptions tab of the page with the [pms-account] shortcode.
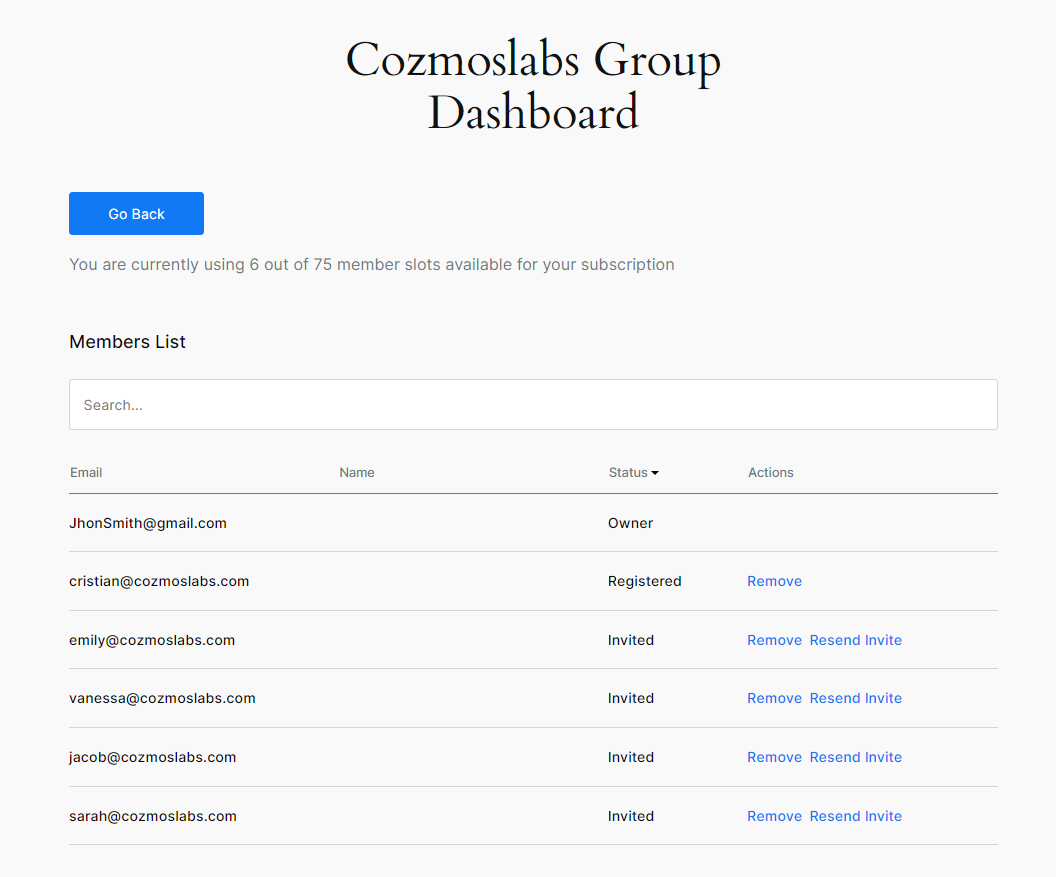
In the Members List section, the owner can see the users that were invited and also users that already registered for the Group Membership.
Through the Actions column, the admin can remove an existing or an invited user and also resend invitations for users who have not yet registered.
By clicking on the column headers for Email, Name, or Status the list can be sorted in ascending or descending order.
The search field at the top lets the group owner find members quickly.
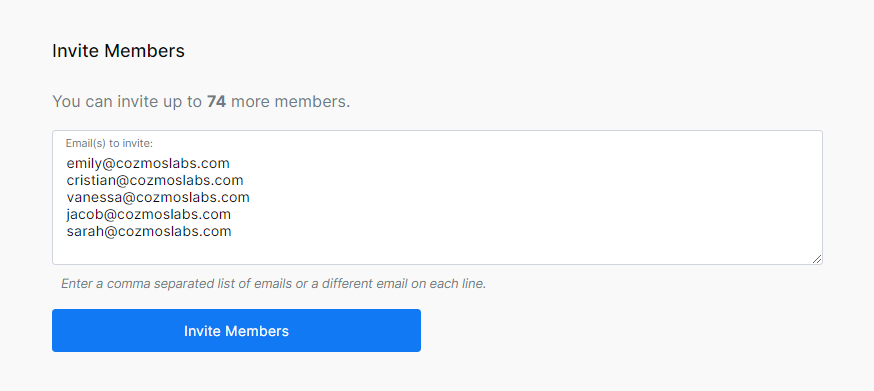
The Group Owner can invite other people to the group membership. In order to invite a user, the group owner needs to enter the user’s email address and afterwards the user will receive an invitation link that he can use to join the website and group membership.
The owner can enter emails in 2 ways:
This provides a lot of flexibility as you can just start typing a bunch of emails that you want to invite or simply copy a list of emails from a csv file. The two methods of entering emails cannot be combined.
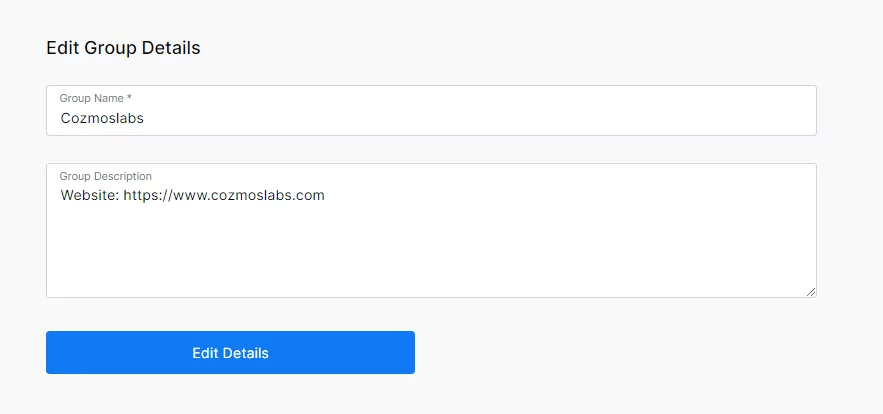
In this section, the group owner can change the Group Name and Group Description provided upon signing up to the group membership.
As an admin, when you view the Members list a new column will be displayed, Group, which indicates if and which group that member is part of. Also, note how the Group filter appears in the filter box after the filter for the Subscription Plan.
Through the Members List, you also have the possibility to filter the list and only show members who are part of a certain group.
Hovering over a member row will let you quickly access the owner subscription.
Clicking on the Group Name will take you to the Group Details page.
At the top of the page, you’ll see the group information and you also have the ability to edit it.
As an admin, you can edit the Group Name, Description but also the Seats assigned to that subscription.
By editing the seats, you can modify the available slots for a certain membership, overriding the default you’ve setup when creating the subscription plan.
The Members List displays all the members that are part of a group, registered, or invited.
Through this page, you can remove members from the subscription or resend invitations to members that have not registered yet and you also have quick access to the subscription of a particular group member.
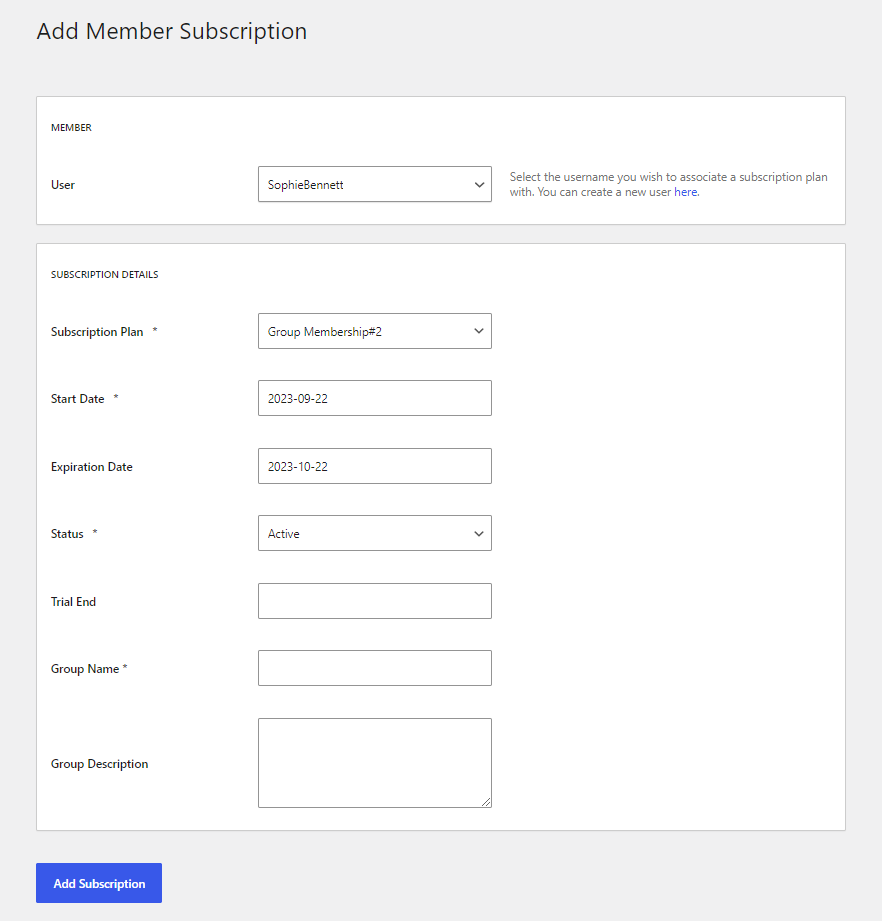
As an admin, you can create a group subscription plan. Go to Paid Member Subscriptions-> Members-> and click on the Add New button-> from this page you can assign a group subscription plan to a registered user from your site. You will need to choose a user from the dropdown and a Group Subscription Plan, then you will need to set a Group Name.
 Invite new members
From the “Invite Members via Email” section you can invite new users to join the group. This section is used for users who do not have an account on your site.
From the “Add Existing Users” section, you can add users who are already registered on your site to the group.
You can change the owner of a group with the “Change group owner” option. You can choose a new owner from among the users who are already members of the group.
The Group Invitation Email that is sent to invited members can be customized from the PMS -> Settings -> Emails page.
There are some extra tags that can be used in the emails:
Combine the power of Profile Builder with Paid Member Subscriptions to set up user registration, memberships, and recurring revenue.
Get 25% off with the bundle